
My Book Illustration Process: The Future Begins with Z
A detailed walk-through of my process for illustrating the new Tim Elmore book, The Future Begins with Z, from pencil sketches to final art.

Earlier this year, my friend Kary Oberbrunner reached out to me about a friend of his who needed illustration work for a new book he was writing about leading Gen Z workers.
I had a call with Tim Elmore and his executive assistant, Melissa Dill, to discuss the project and determine whether we were a good fit. Tim loved my work on REWORK, $100 Startup, and other books I’ve illustrated and decided to partner with me for his book illustrations.
Here is my process for creating book illustrations:
1. Discuss the author’s vision and read the manuscript
My first move is to have a call with the new client to understand their vision for the book and hear if they have any specific ideas for illustrations that may help.
Clients are all different: some have clear ideas on particular illustrations, others let me work my magic, and some fall somewhere in between.
Tim had some general ideas about each chapter, but allowed me to provide sketches and state my case for ideas, so somewhere in the middle.
With his vision in mind, I read the manuscript and let ideas bubble to the surface as my preparation for sketching. Typically, I’ll sketch ideas as I read to capture them.
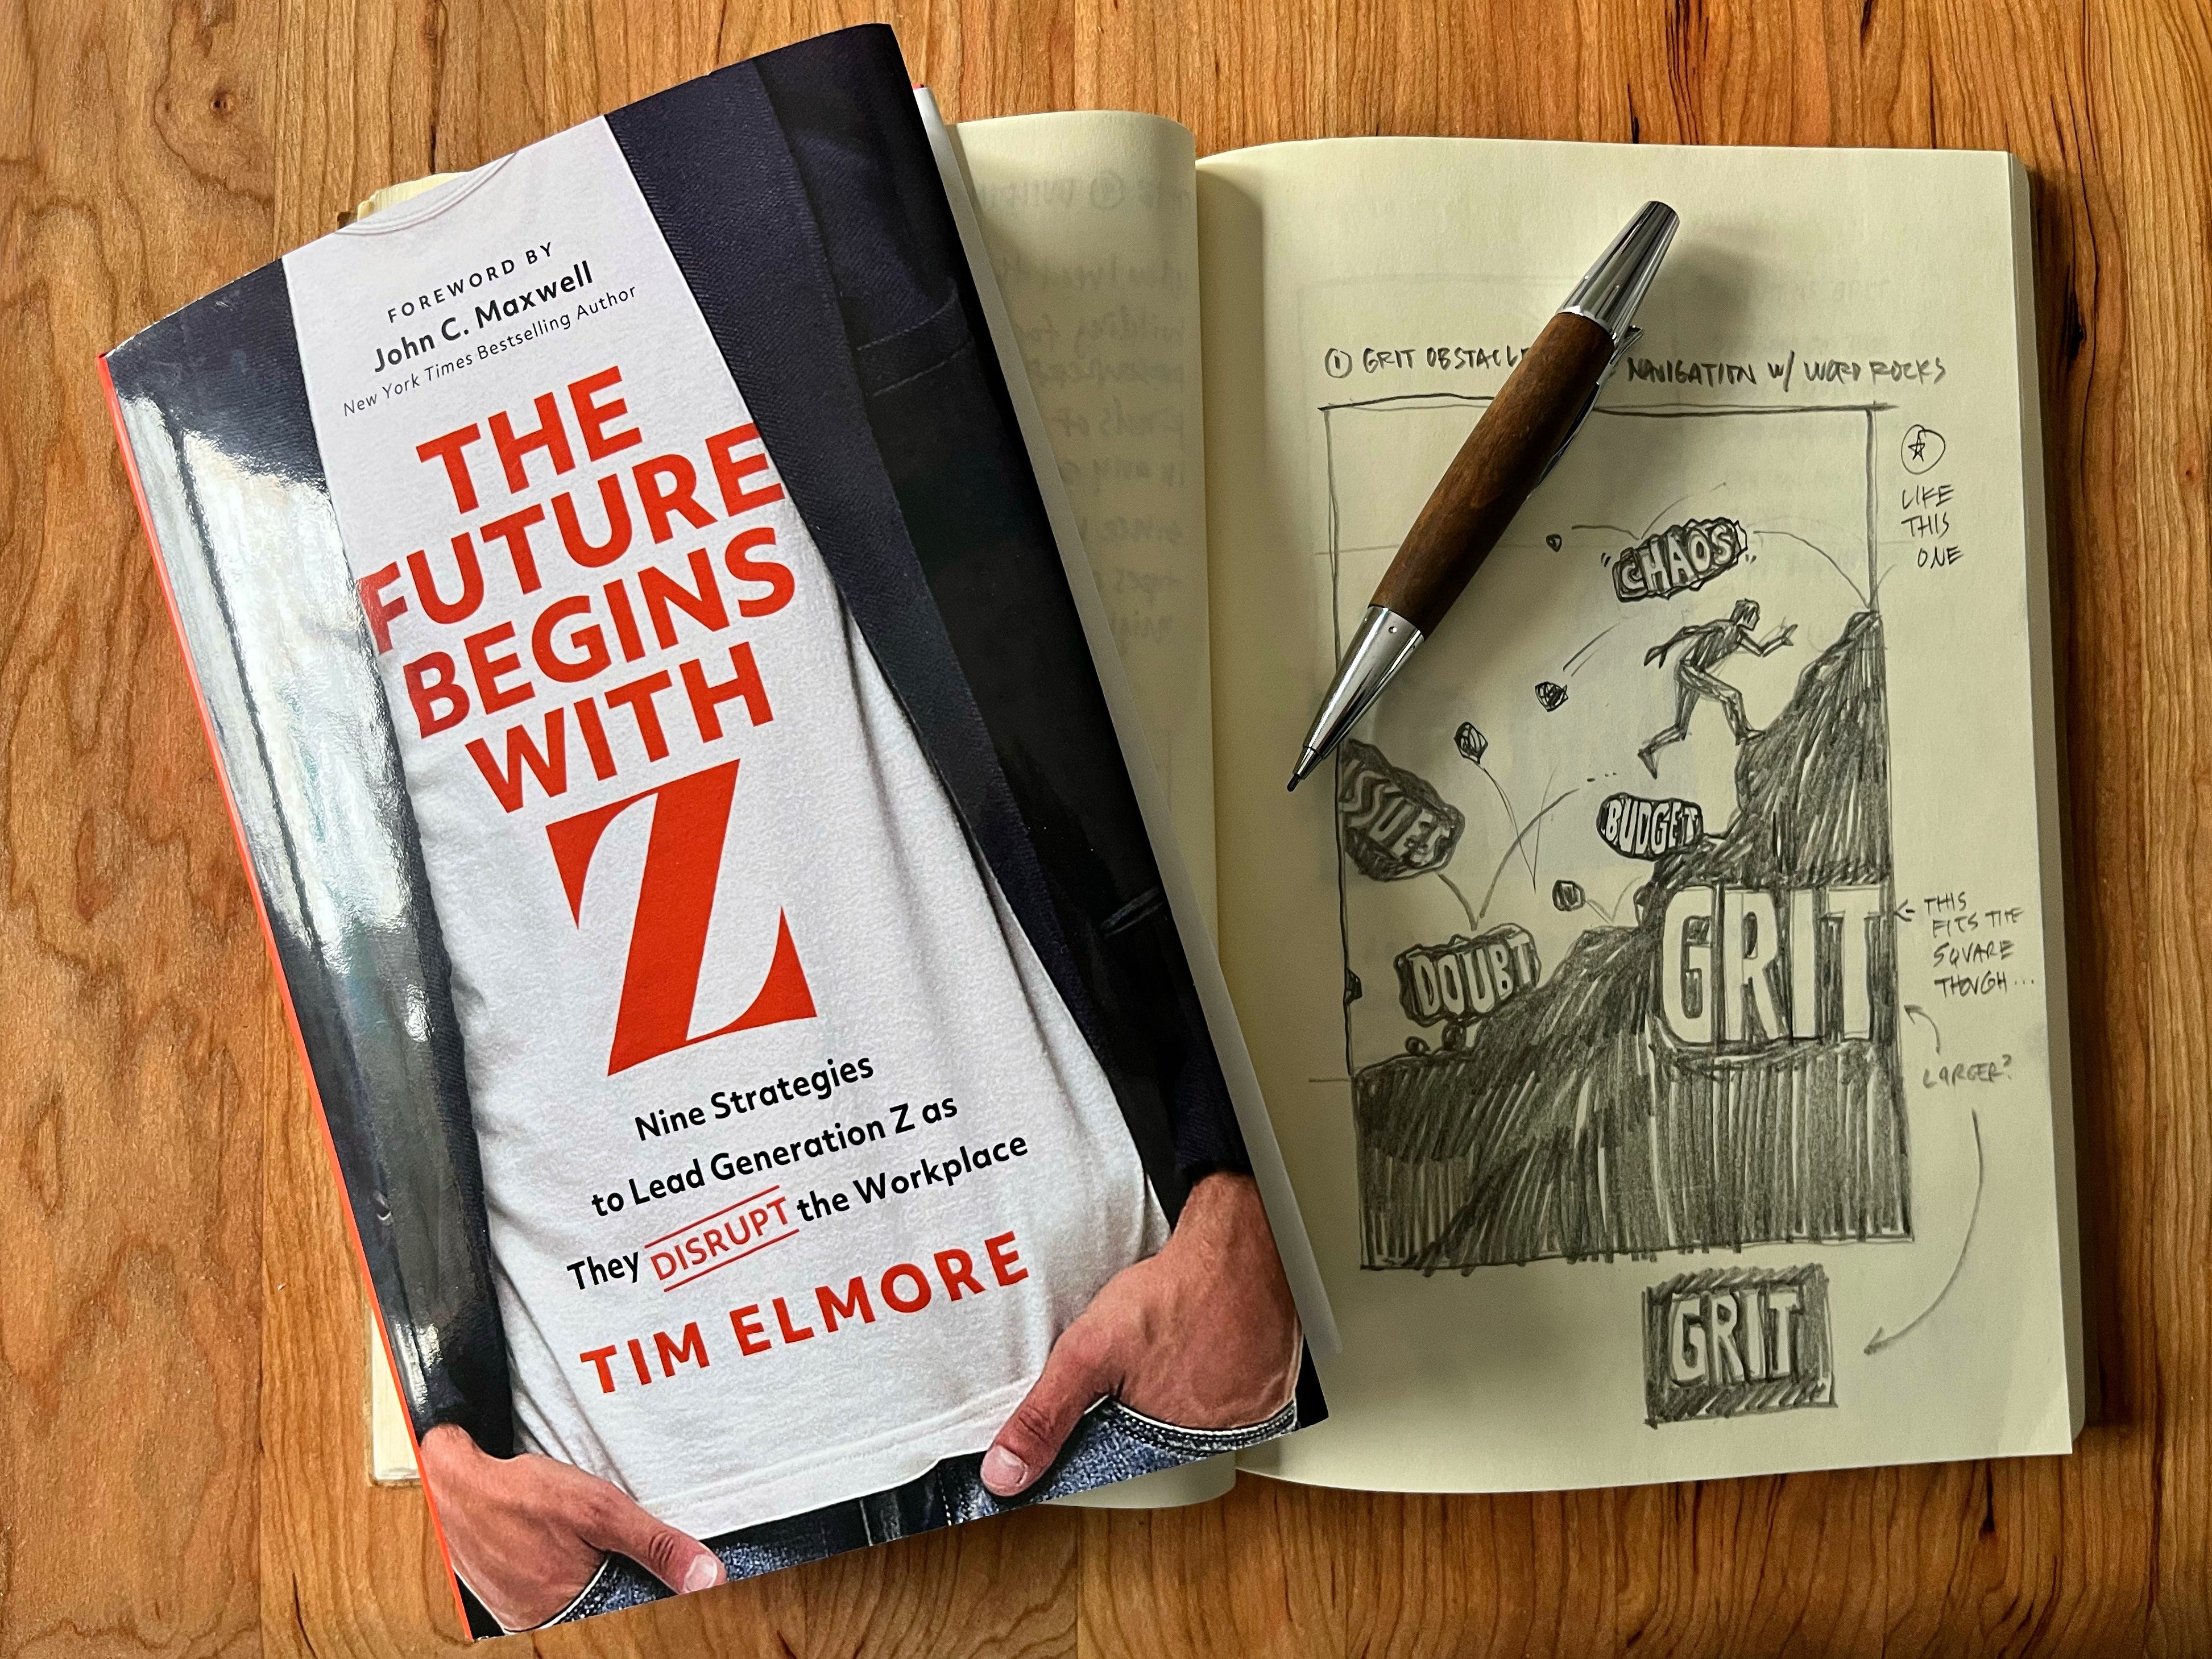
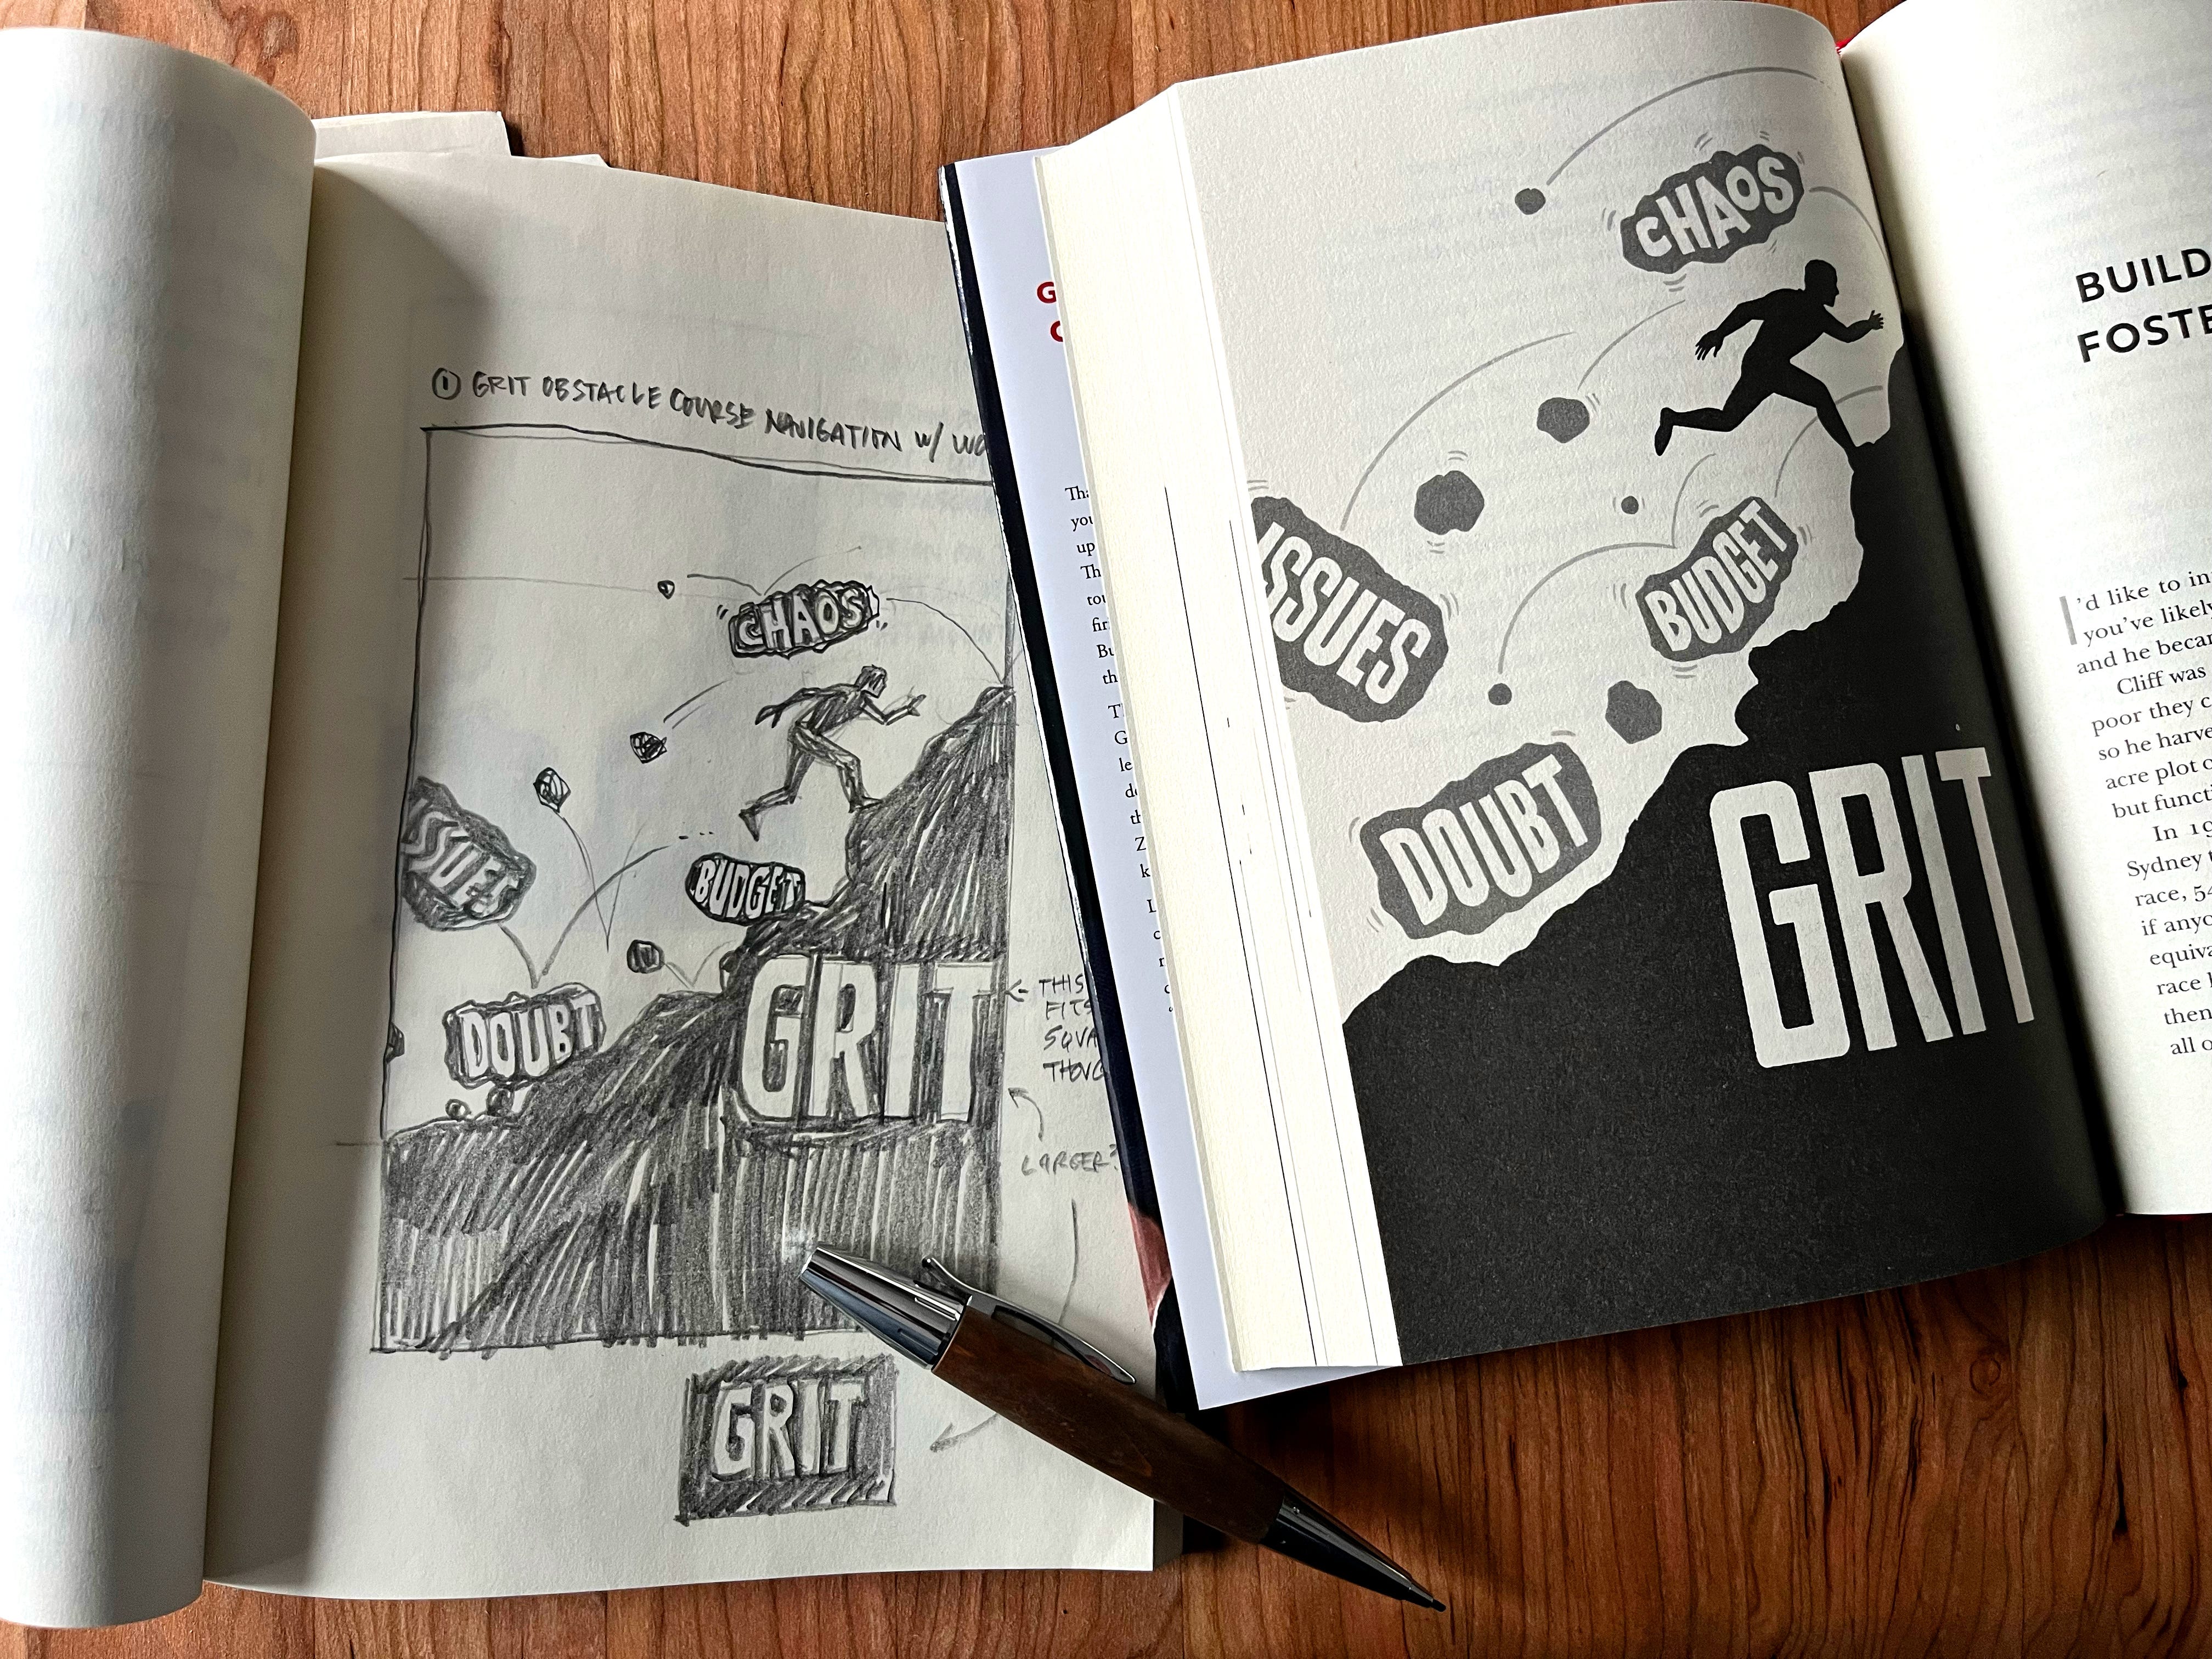
2. Create concept pencil sketches
The most critical part of the process for me is capturing the idea in multiple, iterative pencil sketches. If you don’t solve the concept in pencil sketches, it doesn’t make sense to move to inked illustrations, because you’ll end up making tons of revisions that should have been solved in the sketch stage.
The added advantage of working out the concepts in pencil sketches is the way they draw clients into the creative process. Authors who see the in-progress sketches with written descriptions of the concepts become a key part of the process rather than spectators.
Once all pencil sketches are approved, it’s on to final illustrations.
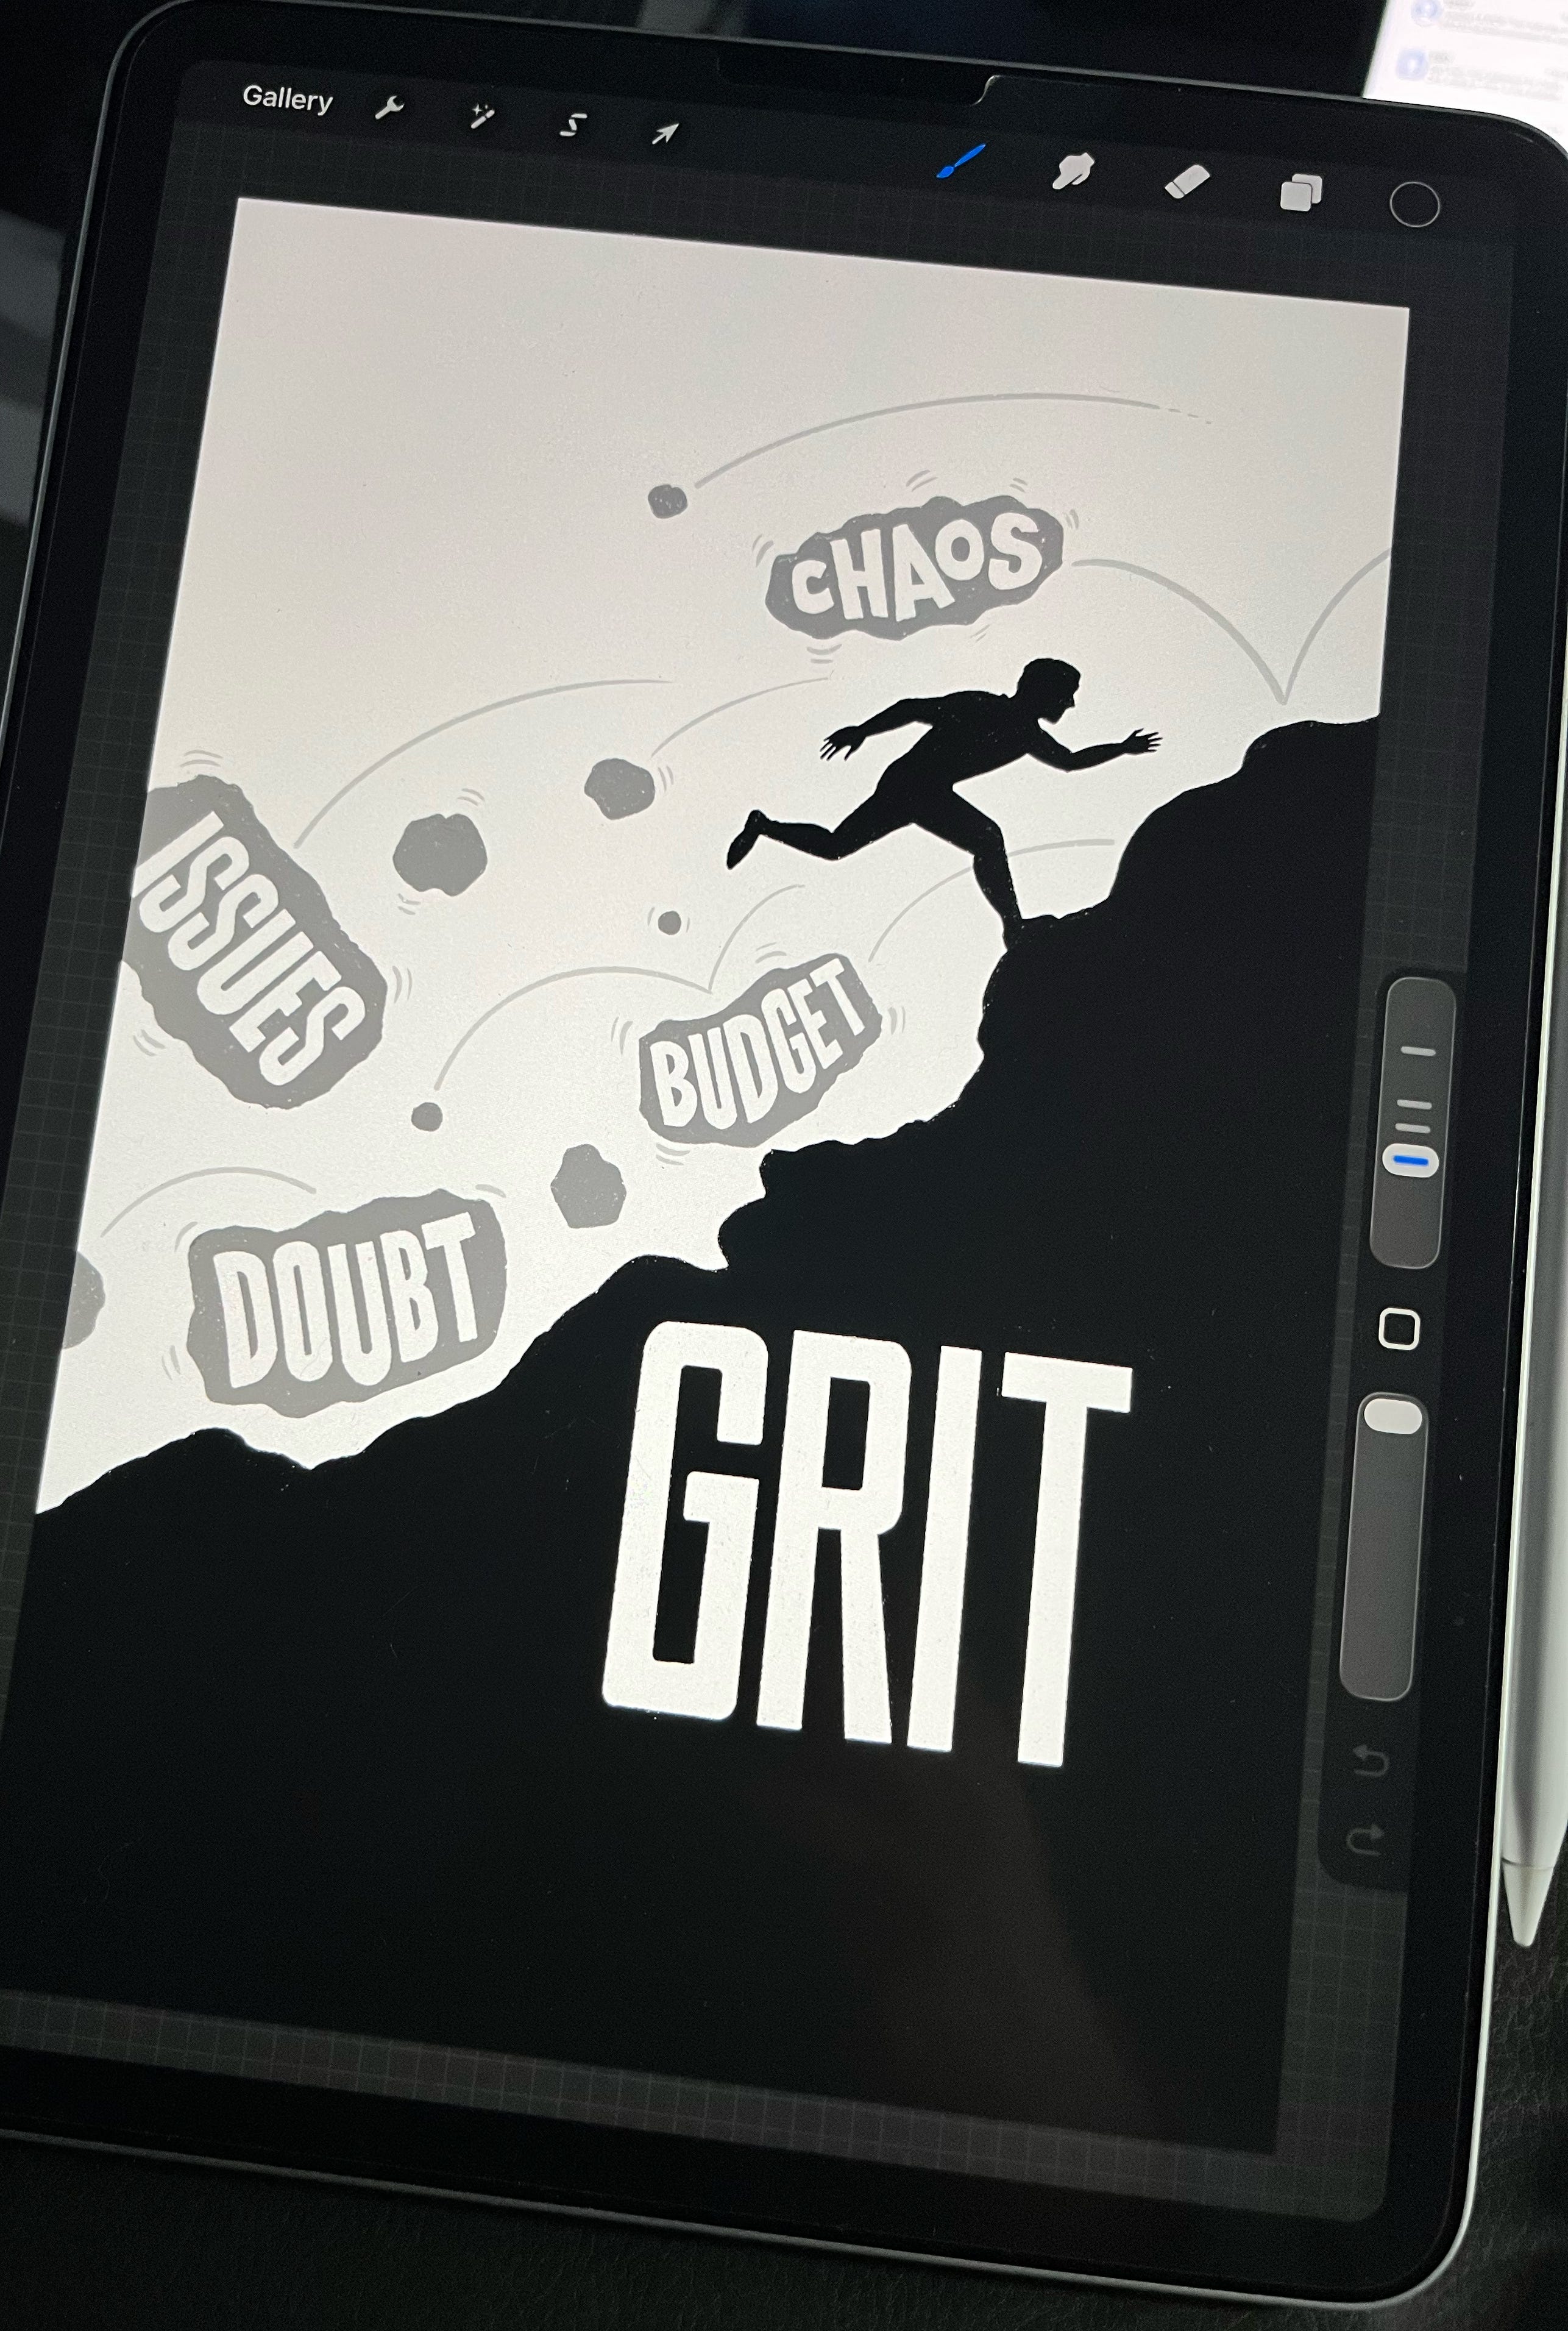
3. Production Inked Illustrations
For production, I request page size, trim, and bleed specs from the HarperCollins production team to make sure my artwork is built to the correct specifications. With those details, I create a master template document with needed layers in Procreate on my iPad Pro and get to work converting the sketches into final artwork.
I like to send my first approved illustration to the book production team so they can verify the size, trims, and bleeds, saving time at the end of the process.
Back when I illustrated REWORK, REMOTE, and The $100 Startup, all the pieces were inked in black in a Moleskine sketchbook or on cardstock, then painstakingly assembled in Photoshop. Having an iPad Pro, Apple Pencil, and Procreate is light-years better for both creation and revisions.
4. Final Approval
The final step is approval from Tim and HarperCollins to make sure everything works for production. Working with the production team early and running test illustrations past them makes the process so much smoother.
The last step was to package and deliver the final illustrations, submit them to the production team, and await the printed book. Here it is:
Complete set of illustrations, from sketches to final
Here are all nine illustrations, with concept sketches on the left and final illustrations on the right. Click on any image below to see it in more detail.


Thanks to author Tim Elmore and his executive assistant, Melissa Dill, for choosing to work with me, their guidance on this book project and to Kary Oberbrunner for making the connection.
Buy Tim’s Book
I thought Tim’s book was an encouraging, helpful resource for anyone who leads or works with Generation Z people. Pick up your copy:
The Future Begins With Z by Tim Elmore
Need illustration help?
I love bringing concepts to life with my illustrations. I’m pretty busy but I love interesting illustration projects that make sense for my skills and schedule.
Have a project in mind?
Reach out and let’s see if your project and my skills and schedule are a fit.
Thanks again for the chance to share something useful in your inbox!
— Mike

Sketchnote Lab is Mike Rohde’s space designed to bridge the gap between sketchnote theory and practice. The goal is to guide you in integrating sketchnoting into your everyday life. Learn more about Sketchnote Lab.
Mike is the author of The Sketchnote Handbook and The Sketchnote Workbook, bestselling books that teach regular people how to start and keep sketchnoting.
He founded the Sketchnote Army and hosts the Sketchnote Army Podcast, where he interviews visual thinkers to understand what makes them tick.
Mike offers recorded, live, and in-person workshops to help accelerate your sketchnoting practice and coaching for personalized, 1:1 sketchnoting guidance.
Become a paid Lab Member to support Mike’s work.
Buy my video workshops
Learn at your own pace with my Reflective Travel Sketchnote Workshop and Sketchnote Live Workshop Set videos, including downloadable videos and PDF templates:


This is so cool!
This is amazing Mike!!
Thank you for sharing your process and illustrations. And, thank you for continuing to inspire us all!